Pages

Showing posts with label DO IT YOURSELF. Show all posts

Sunday, December 2, 2012

The epic woolen adventure


image

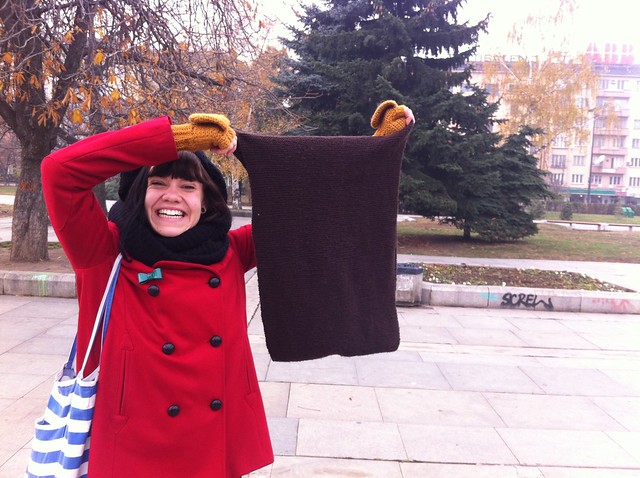
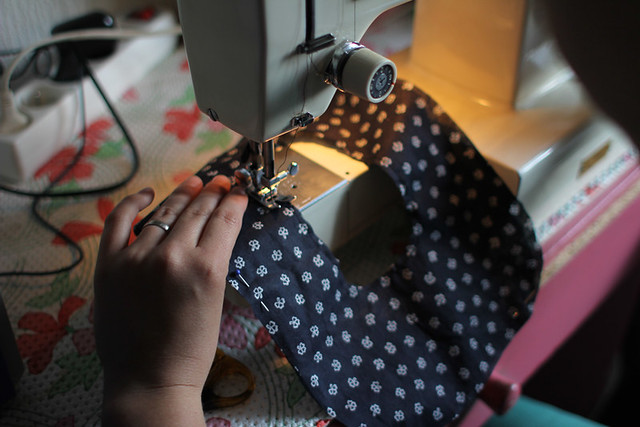
Well, we now take a break from a current series of our Eastern European adventure, to bring you a story. This is the story of how I learnt to knit. You see when we left Australia last year, one of the things I wanted to achieve for 2012 was to learn to knit. Before we head off to Spain and Portugal back in Feburary, Morgan's grandmother got me started and tought me the basics. As we took our trains around these countries I got knitting and maybe finished about 15cm. I was very slow, and the scarf is VERY wide.
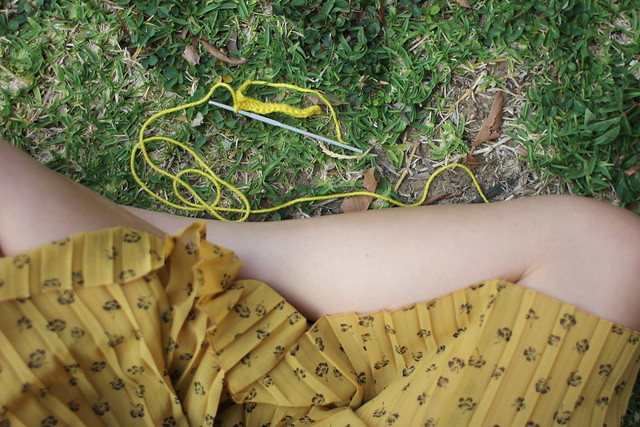
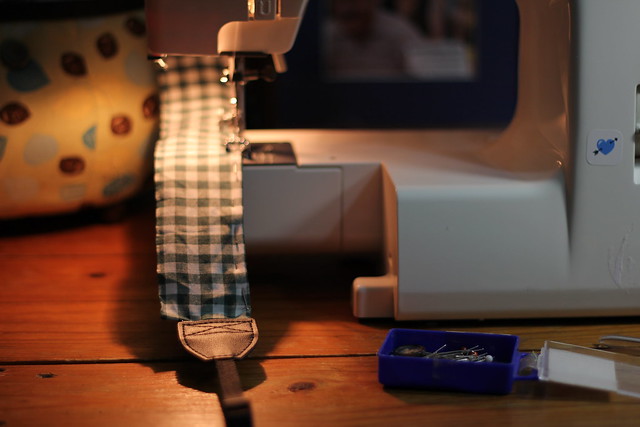
As we have moved around France, I have been knitting along the way with my skinny wool and tiny needles. I was knitting many a night in the Biarritz Surf Hostel kitchen (hence my name as mother of the house), while we were woofing, on the vineyard, all over the country. As the cooler weather was approaching I felt a greater sense of urgency to finish the scarf for Morgan in time for winter. Our time in Bad Berneck was the perfect conditions for me to finish that damn scarf, nearly 9 months later. It's been such an epic journey and I can't believe it is finished.
-kim

image image

Tuesday, July 24, 2012

2 min chocolate mug cake

2 min choc cake

You know when that desire hits to eat something special but you don't have the time to wait for it to be made? We have found the best little treat that you can make in minutes. Morgan and I have loved whipping up this gooey cake in the evenings when craving a little sweet something, and one is perfect to share. This recipe is based on the 2 minute chocolate & salted caramel mug cake

What you need for 1 mug cake:
- 4 tablespoons flour
- 4 tablespoons sugar
- 3 tablespoons unsweetened cocoa powder
- 1/4 teaspoon baking powder
- 1/4 teaspoon salt
- 1 egg – beaten
- 3 tablespoons skim milk
- 1 tablespoon vegetable oil
- chocolate squares and/or caramels

What to do:
1. Into a small bowl add: flour, sugar, cocoa, baking powder, salt, egg, milk, and vegetable oil. Mix to combine.

2. Pour mixture into a regular sized coffee mug. Drop chocolate squares and/or caramels into center of mixture.

3. Microwave on high for one minute and 30 seconds. If needed {if cake batter is still gooey}, microwave on high for up to an additional 30 seconds.

Photobucket

ps. Guess who made their first gif

Saturday, May 26, 2012

i made: man shorts

IMG_4686

One of my goals for this year included making more clothes for Morgan. The weather has been starting to warm up here, so I got Morgan to design some shorts for me to make. I used the Burda Style Jochen pattern as the base and i'm pretty happy how they turned out. They are a bit baggier than I planned, and I think later I will bring them in a little. The best thing is Morgan likes them and wears them all the time, so that is all that matters.
-kim

IMG_4690 IMG_4692 IMG_4694

Thursday, May 10, 2012

i made: a circle skirt

IMG_4293 copy1

The other week I picked up this beautiful circle table cloth at a little second-hand store. I loved the fabric and wanted to make it into something I could wear. This is a really simple sewing project and one you can do with very little time and resources.
1. Fold the table cloth in half and cut out a semi-circle from the top. This hole will be for your waist. Make sure it is big enough to fit over your head or hips.
2. Cut a piece of elastic that fits around your waist or hips (depending where you want it to sit)
3. Secure the elastic in a circle and then sew that onto the top of your skirt. You will need to stretch the elastic as you sew it so it contracts with the fabric when released.
4. Wear your skirt with pride knowing you made it.
enjoy
-kim

IMG_4436 IMG_4421

Friday, April 6, 2012

diy letter cushions

IMG_4136

Since we arrived in France I have been slowly gathering sewing materials to create things again. This week I picked up some fabric for €1 a meter, so I could finally make these letter cushions I have been wanting to create. They are really easy to make, so you can make some too.

IMG_4122
You will need: some fabric, stuffing, pins, scissors and something to sow with. I don't like the cost of buying stuffing brand new, and so I picked up a teddy bear from an op shop and recycled the stuffing from that.

IMG_4124
Cut out a template in the shape of the letters you want to create and pin them onto the fabric. Cut out the letters. You want to have the fabric with the wrong sides together, because when you sew them you will be exposing the raw edges. This means the shape of the letters is more defined, and I quite like the way it looks.

IMG_4125 IMG_4126
Sew around the edge of the shapes, leaving an opening for the stuffing to go in. Once it has been filled with stuffing, sow up the opening, and you are done. If you get a chance to try this please let me know, I would love to see what you create.
enjoy.
-kim

IMG_4131

Friday, December 16, 2011

diy round up

This year, getting ready for Christmas with lots of Christmas crafts has been a little distracted by another exciting event. We haven't even made a new Christmas tree this year, but recycling our one from last year. We are usually pretty good at it, see here & here

I have however been busy finishing off lots of crafts, and working on some tutorials other people have shared online. I thought I would share a little more of my finished products like I did here, to help you if you're in need of some diy christmas present inspiration.

detachable collar
i made a detachable collar from a tutorial from the owls are not what they seem blog

Handmade Book Covers
i also made some fabric covers for our bibles loosely based on the blog moonstitches

Instax Frame
morgan made a frame to hang our instax photos in, inspired by Talia Christine

Homemade Seasalt Scrub
and i made some Peppermint Seasalt Foot Scrub for some christmas gifts from Tipnut

ps. I have pinned a whole heap of great diy ideas on pinterest which could make great gifts. Check them out here, here, here, here and here.
enjoy.
-kim

Thursday, December 15, 2011

christmas cheer.

These past few days of unemployment have been busy and fun. Today I baked some cookies for all my old colleagues at work. I always like to do something nice for the people I work with at Christmas.

Although we don't have much money to throw around this Christmas, I do have time, so made everyone some gingerbread cookies and dipped them in dark chocolate. We have already packed up the cookie cutters so I had to go with circles. I didn't have any little bags to put the cookies in either so I sowed up some Baking paper into little pouches and tied them up with a ribbon.

IMG_2288
IMG_2290
IMG_2295
IMG_2296

They were pretty simple to make, and just used resources I already had, but I think they turned out pretty good, and I hope that everyone who receives one feels pretty blessed.

Have a great day.
-kim

Monday, October 3, 2011

i love my craft group.

IMG_1697

I love my craft group. We have been meeting for about 5 months now (I think), once a month, to share skills and take time to make fun things. My friend Talia started it up and I am so glad she did. Our numbers are still small, but new people are coming along every month.

On Saturday at the Sunshine Coast Brown Owls meet up, I learnt how to crochet. I have been wanting to learn for ages, and this month Gaby taught us all some of her mad crochet skills. I am so excited. I have been practicing my skills all the time since then [thanks gaby!]. I can't wait till I can make a granny square blanket.

I often spend time on other people's blogs and pinterest looking for inspiration, but you can never go past an actual craft group to give you a boost of creativity. This month I challenge you to start meeting with your friends or join and existing group of people who join together to share and inspire each other in creative pursuits. It is so worth it.
-kim

Friday, September 23, 2011

diy round up

So in the past week or so I've completed a couple of great DIY's which I have made following some great online tutorials. Here is four simple and fun DIY's, all of which can be completed in around an hour.

shorts
i made a pair of shorts from a tutorial from maycie after five

easy tote
i made an awesome tote bag from a tutorial from megan nielsen design diary

simple skirt
i made a skirt from a tutorial on the etsy blog

wrap bangle
and my lovely sister sarah made me a wrap bangle from a tutorial from lune vintage

I hope this inspires you to get crafting this weekend. If none of these projects tickle your fancy, you can find a heap of other great tutorials I have on pinned on pinterest here and here.
-kim

ps. you might wonder why these projects were all so cheap to make. I have had some great luck recently, finding lovely material in the remnants box at my local craft store. Make sure you always check to see if there is anything worth your while in the remnants box. Great way to source fabric.

Monday, September 5, 2011

dresses in haiti

A few months ago I, along with a mighty team of others, started sowing pillowcase dresses to send to Haiti. Our friend Dani was going to be heading over with a team to help out at an orphanage and do a ton of other things to help out and make it more sustainable.

Well, Dani has now been to Haiti and came back last week. She just sent me a ton of cute pictures of the kids with their dresses. I just want to give a big THANKYOU all the ladies that helped out. What started as a little idea of mine to try and collect a few, turned into something much bigger. We had some lovely ladies from my Church, the Sunshine Coast Brown Owls team, and friends everywhere were making little dresses to send away. In the end we collected 101 dresses which went to the kids at the orphanage Dani was helping at, and other kids in the community. How great is that!
-kim

IMG_1068
IMG_0910
IMG_1209
IMG_1114

photo credit: dani harriott

Sunday, August 28, 2011

i made: camera strap

morgan and i have both been having lots of fun with our new camera. When it first arrived we started talking about what type of Camera Strap we should get. It came with the standard edition Cannon strap, we weren't real keen on using that one. After browsing heaps of Vinage ones on Etsy, I decided we could reuse the one we already had and make it our own.

I found a piece of scrap Gingam fabric I had left over from a previous project which was the perfect size needed. All I did is unpick the existing camera strap, and sow it back together with my fabric covering the top layer. This was super simple to make and exactly what we needed.

Before1
IMG_0519
after1
- kim

ps. Sorry for the awkward photography. Im still learning how to use the camera.

Tuesday, June 7, 2011

dresses for haiti

Pillow case dress

This story all began about a month ago when Rachel at Smile and Wave post a story about how she was making some dresses she was making some dresses to send with a friend of hers to take to give to little girls in Haiti. I was instantly excited about what she was doing and planned to make some myself to send along. But as it always does, life happened and after a series of strange events I missed the deadline to post the dresses to make the trip to Haiti. I was super bummed I missed my chance to send some dresses but that same day I found out my lovely friend Dani is heading over to Haiti in early July to help renovate an Orphanage and make it more sustainable. Woah! Isn't that awesome, so I have a new plan, and this one you can get involved in too.

So here it goes...
I'm gonna be collecting handmade pillow case dresses for Dani to take in a months time. I'm putting this out there to see if you can help me and Dani make enough dresses so each little girl can have a pretty new dress.

DRESS BEFORE
DRESS AFTER

There are tons of great tutorials around to get you started here, here, here, and here. If you wanna get involved, flick me an email [kimberley [dot] tm [at] gmail [dot] com] and I will give you my postal address to send them. Its probably best if you live in Australia, but if you really wanna get involved feel free to get involved where ever you are.

This dress I made cost me only 1 dollar and about 30mins of my time. At this rate we can all afford to get involved and share some joy in Haiti. Please share this around so we can get as many dresses made as possible.

I'm also gonna be sharing how to make these dresses at the next Sunshine Coast Brown Owls Meet Up. If your living on the Sunshine Coast you should definitely come along and check out this new group my friend Talia has started.
Thanks heaps.
-kim

Friday, May 6, 2011

Pay it Forward Revisited

photo (2)
At the start of the year we par took in a little game called Pay it Forward. The idea, make something for five people and recieve something from one person. We got sent this beautiful mini bunting from Georgina at Perpetual One.
Sadly only one person, Talia took our call out and recently recieved her little gift. If you would like to partake in this great craft cause please read our post here and sign up. It's a great way to be generous and get something nice from us too!

IMG_0921

-morgan

Thursday, April 28, 2011

april challenge pt2.

before after

So, this weekend just gone, I actually finished another dress, and fortunately this time i also actually took a before photo (don't mind the crazy face)... I got this dress from a clothes swap about a year ago and loved the print but thought the dress looked like it was from a polish concentration camp. It took me a while to work out what I wanted to do with it, but I am happy with the result. All I have done is brought up the waist with a new waist band, given it new sleeve cuffs and a collar. This probably took me about 6 hours all up, but I had a few complications which dragged it out. This was my first Peter Pan collar which I messed up a little, but I rekon next time I'll get it perfect. Enjoy.
-Kim

IMG_0956
IMG_0955
IMG_0959
IMG_0960
IMG_0963
finally the handsome photographer...

Thursday, April 21, 2011

april challenge pt1.

So, as a result of my April Challenge to work through all the clothes waiting to be sowed in my art room, I am finally making progress and taking photos. Unfortunately in all the excitement of sowing this dress, I forgot to take a before photo [woops], so you just have to imagine what it looked like.

IMG_0938
I brought this dress for $2 at an op shop because I was instantly in love with the fabric print. If you can't tell in the pictures, there are parrots all over this dress and they make me smile. When I brought it, this dress was really wide and frumpy with a drop waist, not really my style or suits my body shape, so I took to it with some scissors and a sowing machine and this is what i achieved.

IMG_0943
IMG_0940

I am so happy with how it turned out, and have been wearing this dress so much since I finished it. It was so easy, you can do it too. Hope this inspires you to take to the sowing machine and make old clothes great again this weekend. With all the public holidays here because of Easter i'm going to be sowing even more, so I should have more things to share next week. Enjoy...
-kim

ps. what im wearing: pack brixton hat [gift from derek], opshop dress, belt and bag, found sunnies, and whittner shoes from dfo.
Related Posts Plugin for WordPress, Blogger...